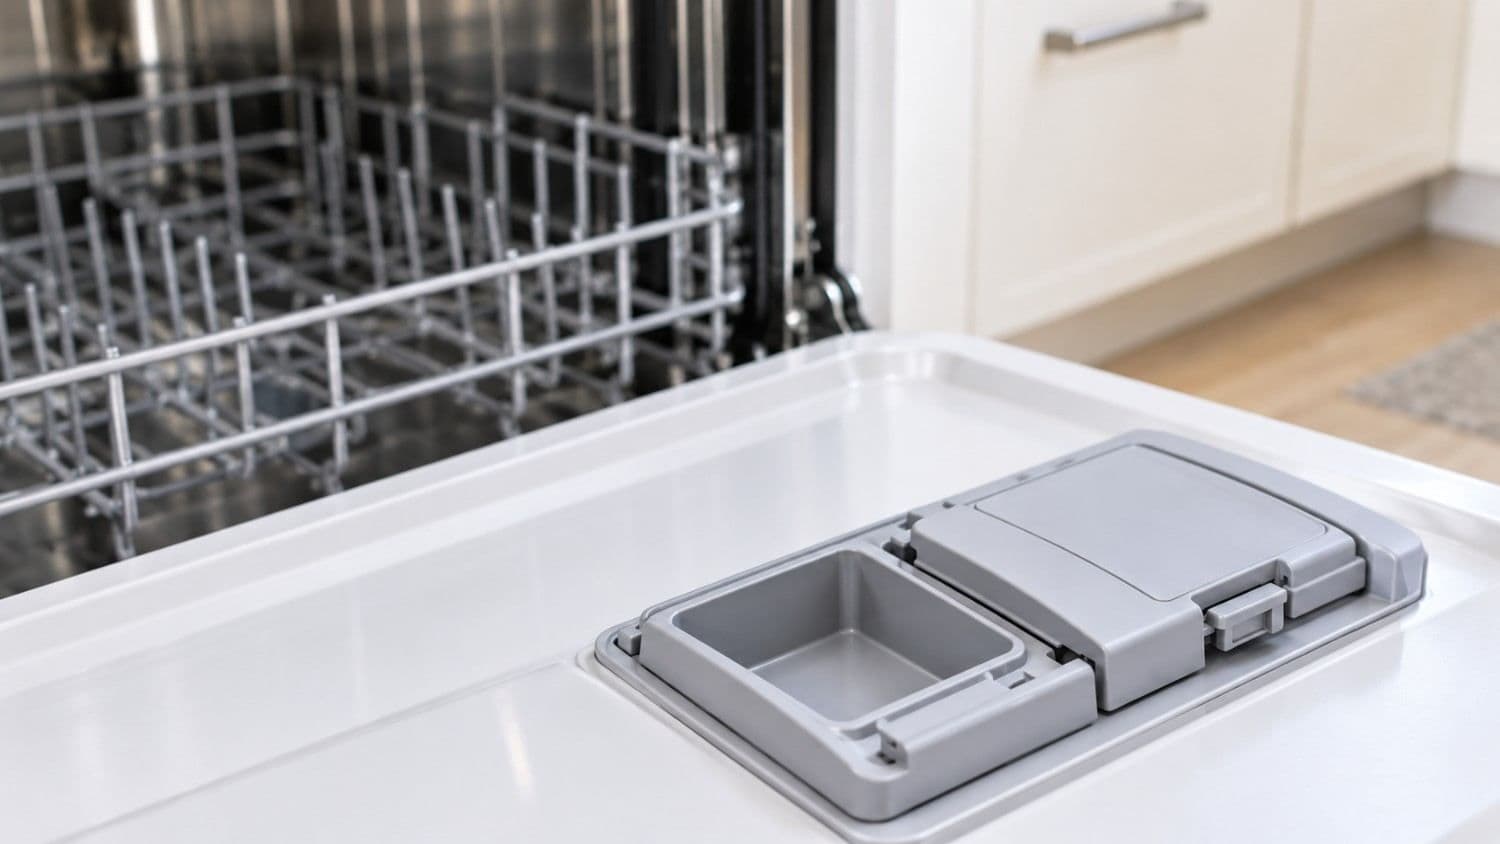
Most of the time, the dispenser door isn’t broken. Something in the lower rack is blocking it, or damp, caked detergent has glued it shut. If neither is true and the lid still stays shut during the cycle, the fault is usually in the release: a worn latch or spring, or the small actuator behind the dispenser that is supposed to let go of the catch at the right moment.
You can usually tell which in a few minutes. Start with the free checks. Only the last steps involve opening the door panel.
Which problem do you have?
These look alike from the kitchen floor, but they point to different fixes. Match what you found after a cycle before you buy a part.
- Lid still latched, detergent dry or barely wet. The door never released, or something held it shut. Start with The five-minute checks, then The hand test.
- Lid open, but the detergent is a wet lump, a partly dissolved pod, or an intact pod. The door released, but water didn’t flush the cup, or the cup was damp. See If the door opens but the detergent stays put.
- Lid opened only partway, detergent gone, dishes clean. Probably normal for your model. Nothing to fix. See Some lids are meant to open only partway.
- Lid pops open the moment you open the dishwasher door, detergent still inside. Something held it shut during the cycle, or the release never fired. On some models the pop is by design, so judge by the detergent. If it’s still there, do The hand test.
- Lid opens easily by hand but never during a cycle. The release isn’t firing. Go to Testing the actuator.
- Works sometimes, fails more often. A part is wearing out. Do The hand test and plan the repair.
That last one matters. In one Bosch owner’s forum post, the door stuck occasionally at first, then rarely opened at all. An intermittent fault is usually an early warning, not a fluke.
The five-minute checks
Work through these in order. They cost nothing, and manufacturer help pages list them first.
- Clear the door’s path. Whirlpool notes that large items such as pots and pans placed too close to the dispenser can stop it from moving. Cutting boards, baking sheets and tall utensil handles in the front of the lower rack are the usual culprits. Reload with that corner empty and run a cycle. If your upper rack is adjustable, check its height too. LG says that with tablet detergent, the rack in its lowest position can stop the door from opening fully.
- Check the spray path. Water from the lower spray arm has to reach the cup to flush the detergent out. Anything blocking the path between the spray arm and the dispenser can leave soap in the cup even when the lid opens.
- Dry the cup before you fill it. A pod dropped into a damp cup can swell and stick.
- Use fresh detergent. Whirlpool says detergent exposed to air clumps and dissolves poorly, and the door can stick to it. Store it in a tightly closed container somewhere cool and dry, not under the sink.
- Clean the cup, latch and hinge. Dried detergent around the latch can stop the catch from releasing. Warm water and an old toothbrush are enough.
If the problem is gone, you’re done. If not, move on to the hand test.
Some lids are meant to open only partway
Before you decide the dispenser is broken, check your model. On some dishwashers, the cover presses against the top rack so it doesn’t open fully, which lets the lower spray arm flush the detergent out.
GE Appliances says that on dishwashers with flip-open detergent cups, it’s normal for the cover to open against the upper rack, to about a 45-degree opening.
Sears PartsDirect describes the same design, and it’s why the cover can pop open when you open the door. Judge by the result. If the detergent is gone and the dishes are clean, nothing is wrong.
The hand test
This test separates a mechanical problem (the latch, spring and hinge) from an electrical one (the release isn’t triggered).
Safety first. Unplug the dishwasher or switch off its breaker before you open any panel or test any part. If it’s hardwired, use the breaker.
- With the power off, open the dishwasher door and empty the dispenser.
- Close the lid until it latches.
- Press the release by hand and watch what the lid does.
What the result means:
- The lid springs open decisively. The latch, spring and hinge are probably fine, and the release isn’t firing in the cycle. Go to Testing the actuator.
- The lid opens sluggishly or drags. Residue, mineral film, or a weak spring. Clean again and retest. If it’s still slow, replace the spring and pin or the latch kit.
- The lid won’t stay latched, or pops open. The latch is worn or broken. You need a latch kit or a full dispenser assembly.
- The lid won’t release at all. Caked detergent or a broken latch. Clean, retest, then replace the latch or assembly.
How the door is released
Three things have to work together: a spring that wants to fling the lid open, a catch that holds it shut, and something that moves the catch at the right moment. That moment is the main wash.
Whirlpool notes that detergent in the pre-wash compartment is released as soon as the cycle starts, while detergent in the main dispenser is released later, during the main wash. The exact timing varies by model and cycle, so check your manual rather than trusting a number from the internet.
What moves the catch depends on the dishwasher’s design:
- Wax motor. Used in newer models, it acts like a solenoid when the timer or control powers it, and its piston operates the mechanism that releases the catch. Electric current heats a small wax-filled element, the wax expands, and a plunger pushes the catch aside.
- Bi-metal release. Some older models pass electric current through a metal strip that bends and frees the catch.
- Timer-driven lever. Some models use the timer to operate a lever mechanically at the right point in the cycle.
- Solenoid. Some guides describe the actuator this way. Parts sites aren’t consistent about the names.
Wax motors and bi-metal releases are slow by design. A Maytag service-manual excerpt lists a quarter-inch stroke within 60 seconds of power being applied. So don’t expect a snap the instant power arrives.
Working out what you have
Part names add confusion. The same thing may be sold as a dispenser, assembly, actuator, latch kit or “tripping device.” Look up your model number on a parts diagram to see what your dishwasher actually has.
- Find the model plate. On dishwashers it’s usually on the door edge or inside the tub.
- On a Kenmore, the first digits tell you who built it. Our Kenmore vintage page lists 665 as Whirlpool-built dishwashers.
- Look for the tech sheet. One GE owner reports it’s stored under the dishwasher behind the front toe-kick panel. Some models also have a diagnostic mode described there that can trigger the dispenser, so check whether yours does.
If you have an older dishwasher, as many Sun City homes do, the release is more likely a bi-metal strip or a timer-driven lever than a wax motor. Our vintage appliance repair page covers how we handle older models.
If the door opens but the detergent stays put
If the lid is open and the detergent is still sitting there as a wet lump, the dispenser did its job. Replacing it won’t help. Look at:
- Moisture in the cup before loading, or old detergent that swelled.
- A blocked spray path, or a lower spray arm that can’t spin freely.
- Clogged spray arm holes or a dirty filter, which reduce the water thrown at the dispenser.
- How the pod sits. Check that it isn’t jamming the lid.
- Cold incoming water. Home-services guides commonly suggest running the kitchen tap until the water is hot before you start the dishwasher.
Mineral scale in spray arms is something we check on every dishwasher visit. It’s covered on our dishwasher repair page.
Testing the actuator
If the hand test shows the lid springs open fine but never opens in the cycle, the actuator or its power supply is next. The same power-off rule applies, plus two more:
Support the outer door panel as the last screws come out, because it can fall. And don’t run the dishwasher with the panel open to check for voltage. Sears PartsDirect says live voltage checks should be done only by someone properly trained.
- Remove the inner door panel (usually Torx screws). Follow a video for your exact model, since the order differs by brand.
- Inspect the connector on the dispenser. Reseat it if loose and look for damage.
- Unplug the connector from the actuator and set a multimeter to measure resistance.
- Touch the probes to the two terminals. An “open” or infinite reading means the actuator has failed and the assembly needs replacing. A reading near the spec for your model means the electrical path through the actuator is intact.
What the number means, and what it doesn’t:
- There is no universal value. Sears PartsDirect’s example dispenser should read between 1,400 and 2,800 ohms. A Maytag service-manual excerpt lists about 2 kΩ for its dispenser wax motor. Use your own model’s tech sheet.
- A normal reading shows current can flow through the actuator. It doesn’t prove the wax expands or the plunger moves.
- If the actuator reads normal but the door still doesn’t release, the cause could be wiring, the control board, or an internal mechanical failure in the dispenser. That’s the point to call a technician.
“I replaced the part and it still won’t open”
This is common enough to deserve its own section. These are things owners report on parts and repair forums. Treat them as anecdotal:
- Reassembly. One owner’s dispenser stopped opening right after they cleaned behind the inner door panel, and they suspected the panel hadn’t gone back together correctly.
- Linkage. One owner traced a new Whirlpool’s failure to a broken zip tie holding the latch to the wax motor’s plunger shaft.
- Power never arriving. One owner replaced the wax motor and still had no release, and suspected the control board.
- A burned actuator. One KitchenAid owner found the wax motor melted and darkened. Inspect it and the plastic near it.
- Assembly vs. motor. On some models the dispenser and gasket are sold as one piece, and the motor isn’t sold separately. “Replace the actuator” can then mean replacing the whole assembly.
What it costs to fix
The answer depends on which step of this ladder you land on, from cheapest to most expensive:
- Reload, dry the cup, fresh detergent, clean: $0 and a few minutes.
- Latch kit, spring and pin, or lever: roughly $6–$26 for the part. These are small parts, usually from the inner door. The range comes from Whirlpool, Bosch and GE latch and lever parts on AppliancePartsPros.
- Complete dispenser assembly: roughly $41–$109 for the part, depending on brand and model. The panel comes off, the wiring is disconnected and a new unit is fitted.
- Mechanical timer (older dishwashers only, and only if the timer drives the release): $150–$250 for the repair, which is our vintage page’s range for timer replacement.
- Control board: $250–$500, which is our dishwasher repair page’s range. A technician confirms this one.
- Professional visit: $89 diagnostic, waived with repair, and a flat-rate quote before work starts. Dishwasher repairs on standard brands typically run $180–$450.
Part prices were checked on AppliancePartsPros on 30 October 2026 and will change. Check your model number before you buy.
A worked example. Say the hand test shows the lid springs open but never fires in the cycle, and the actuator reads open. On many models that means a complete dispenser assembly at roughly $41–$109.
A new standard dishwasher runs $900–$1,600 on our dishwasher page’s repair-or-replace guide. Even with a professional visit added, replacing a dispenser assembly is usually well below the cost of replacing the machine. The picture changes if the cause is the control board on a very old unit. That’s where a diagnosis earns its fee.
DIY or call someone? Retailer listings rate dispenser swaps as moderate, at roughly 10 to 45 minutes. But one Bosch owner found the job more involved than the videos suggested, with both the front and control panels coming off.
If you’re comfortable with a screwdriver and a multimeter, it’s a reasonable job. If not, a diagnostic costs less than a mistake. If the dishwasher is still under manufacturer warranty, check that before taking anything apart.
Keeping it from happening again
- Keep the cup dry and the detergent fresh, and store it away from damp.
- Clean the dishwasher regularly. Whirlpool recommends about every 30 days to keep film and residue in check.
- Leave the front of the lower rack clear when you load.
- Know your water. Mineral film on a latch or hinge can make a door drag. Eastern Municipal Water District (EMWD) publishes its water-quality figures every year in its Consumer Confidence Report.
When to call a pro
Call someone if:
- the hand test shows a healthy latch, the door still never opens in the cycle, and you’re not comfortable opening the door panel;
- the actuator reads normal but the door doesn’t release (wiring or the board);
- you find a cracked inner door panel, damaged wiring, or scorched plastic;
- you’ve already replaced a part and it still fails.
If you’re in Menifee, Sun City, Quail Valley, Wildomar or Perris, we can look at it. The visit starts with an $89 diagnostic, waived if you go ahead with the repair.
You get a flat-rate quote before any work begins, the same technician does the diagnostic and the repair (you can read about Jim), and the work carries a 90-day parts and labour warranty.
Our Sun City service halves the diagnostic fee ($44.50) if the appliance turns out not to be worth repairing. Call before 11 am to check same-day availability.
We service Whirlpool, KitchenAid, Maytag and GE dishwashers, among others.
Book a visit and describe what the lid does, and we’ll get back to you to confirm a morning or afternoon window.